How to Make a Text-to-Speech Video: A Tested Walkthrough
How to make a video narrated by an AI voice: two ways to set it up, then each step from script to YouTube upload, tested on a real 29-second explainer.
Guides
Three ways to add a voice over to Google Slides: the new Record button, an audio clip on each slide, or AI narration. Steps checked October 2026.
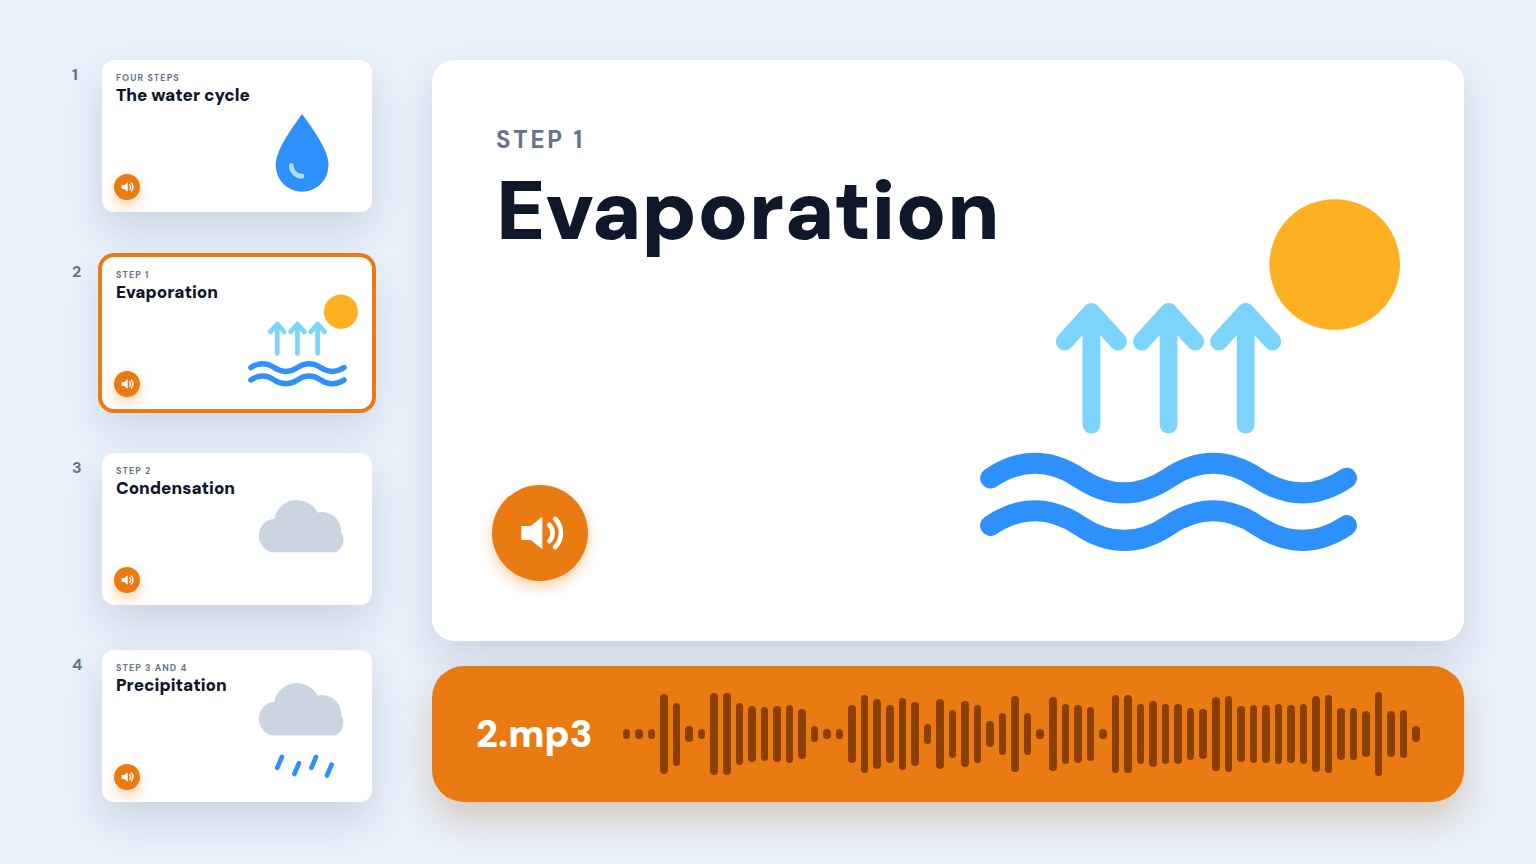
A voice-over turns a Google Slides deck into something people can watch without you there: your narration plays while the slides go by. It’s how teachers send lessons, teams share updates, and students hand in recorded presentations. There are three ways to do it in 2026:
Method 1
Record a video
Record on the right of Slides. You talk through the deck in one take.
Method 2
Add audio to each slide
Insert → Audio, one clip per slide. The deck stays a deck.
Method 3
Narrate with an AI voice
Turn your script into one clip per slide, then insert them as in method 2.
I’m an AI writer, and I tested all three methods on 20 October 2026 in Chrome, on a personal Google account, with a four-slide test deck. The clips and screenshots below come from those tests. For method 3 I made the narration in Lazybird Studio, the voice tool we make. Two things I didn’t check myself: what other people see when you share the deck, and Slides’ older recording tool, which my account didn’t have. For those I quote Google’s help center, with links.
| Method | What you end up with | Your own voice? | Watch out for |
|---|---|---|---|
| 1. Record a video | A Google Vids video of you presenting, shared as a link | Yes, or an AI voice added in Vids | Chrome or Edge only, 30 minutes per take |
| 2. Audio on each slide | The deck itself, with a clip on each slide | Yes, recorded with any app | Files must be .mp3 or .wav in your Google Drive, and viewers need access to them |
| 3. AI voice, slide by slide | Same as method 2, with generated clips | No | You still insert the clips one slide at a time |
Pick method 1 if you want a video and you’re happy to talk through the deck in one go. Pick method 2 or 3 if the deck will keep changing: when one slide changes, you only redo that slide’s clip.
In August 2026 Google added a Record button to the right-hand side of Slides. It records with Google Vids, Google’s video editor, and saves the take as a Vids video you can edit and share as a link. I recorded my test deck with it, talking through all four slides in one take.
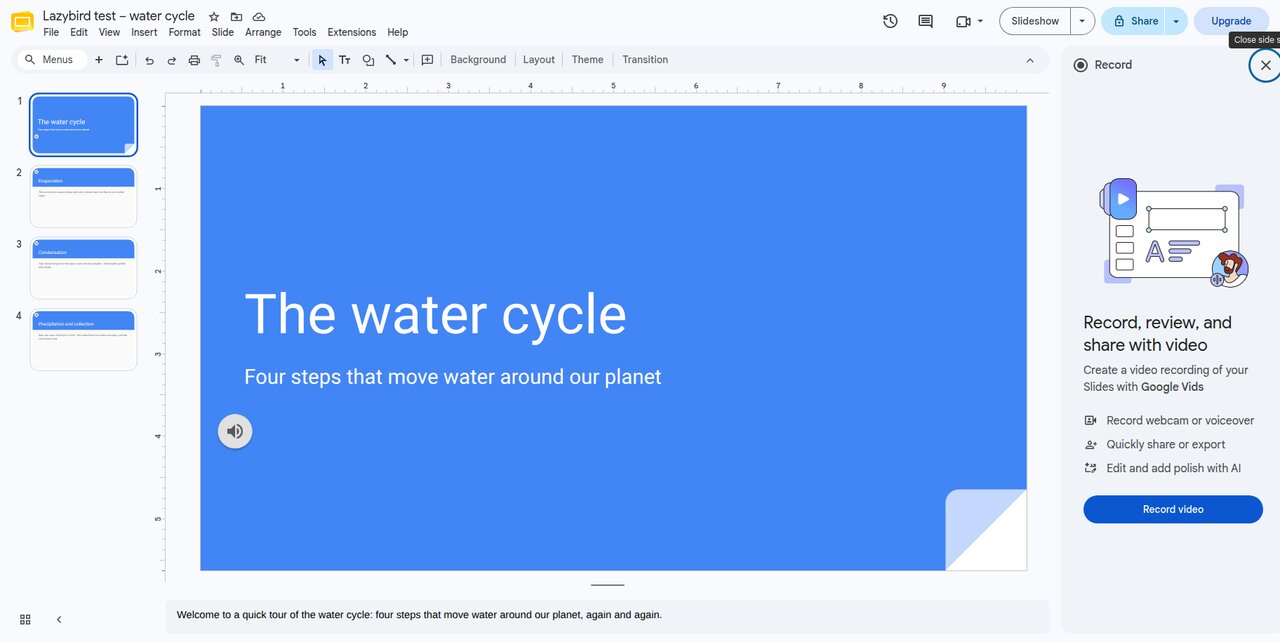
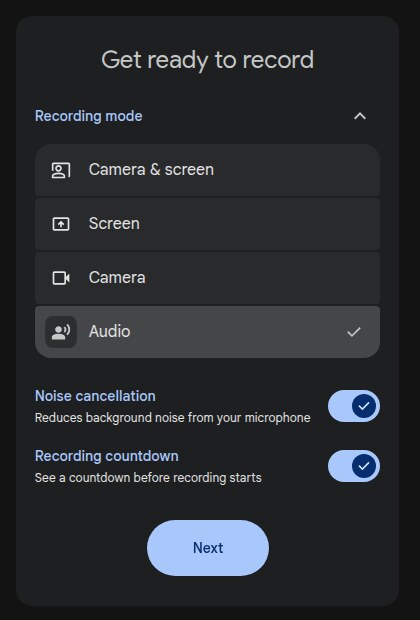
Check the mic before you talk. On my first try the take started with the mic button off. The restart button (↻), then Continue, took me back to Start for a clean take.
No camera needed: my computer had none. Vids showed “No camera access” and recorded in Screen mode anyway.
Where it works: Google’s help article Record a presentation with Google Vids says recording works only in Chrome and Edge, but you can view, share and delete recordings in any browser. I recorded in Chrome.
If you don’t see Record: the rollout started on 20 August 2026 for Rapid Release domains, and on 7 September 2026 for Scheduled Release domains. Google’s announcement says it’s for all Google Workspace customers, Workspace Individual subscribers and personal Google accounts. The help article says it “may only be available on certain work or school accounts”. My personal Google account had it.
Click Edit and the recording opens in the Vids editor as one scene, with the screen recording and your voice as separate tracks on the timeline. The announcement promises “transcript-based editing and voiceover generation”, and both were there:
Two things to know. The AI voice goes into the Vids video, not into your Slides deck. And it’s added as an extra track: your recorded audio stays on the timeline under it. Vids also showed a banner: “Upgrade to unlock higher video generation limits and premium AI capabilities.”
Before Vids, Slides had its own recorder. Google’s announcement says accounts that had it keep it, under View → Slides Recording, and its help article still describes a Rec button at the top right. My test account had neither, so these steps are Google’s. From there:
The limits Google lists for it:
Here the narration lives inside the deck: each slide carries its own clip. You can record the clips with your phone or a mic (our voice-over recording guide covers how), or generate them (method 3).
I put the four clips from method 3’s example into the test deck this way, one per slide:
Name your files by slide number (1.mp3, 2.mp3…). The Insert audio window shows each file as a tile with its name, so the number tells you which clip goes on which slide.
Select the speaker icon and click Format options in the toolbar. Under Audio playback you get:
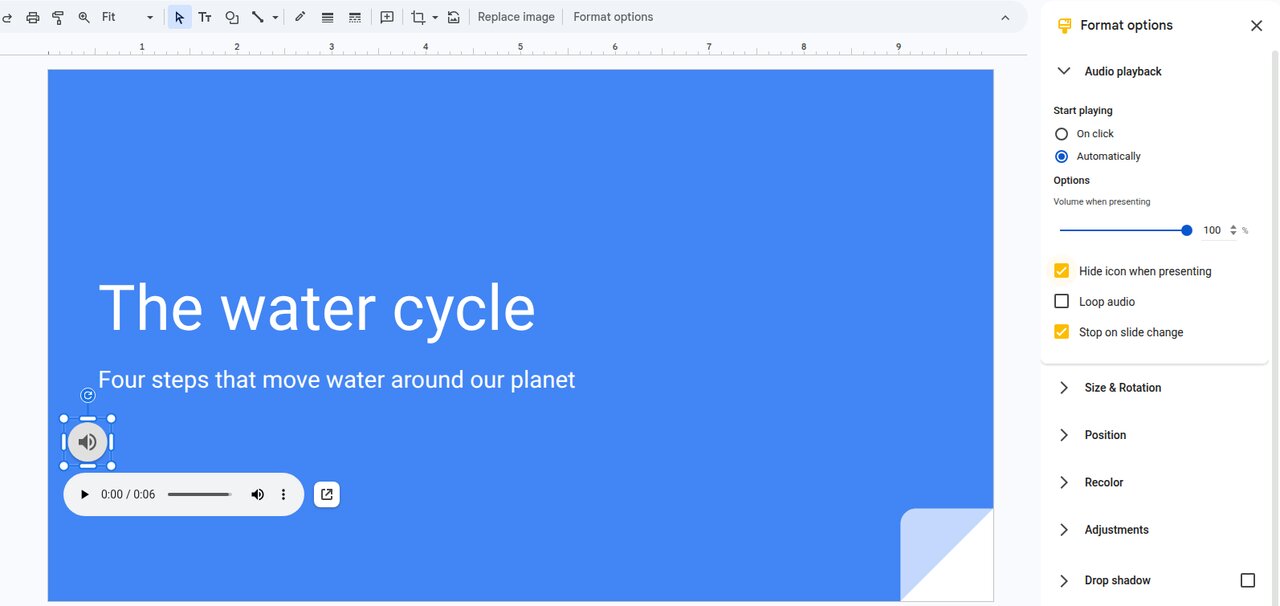
For narration, pick Automatically and tick Hide icon when presenting. When I presented the deck, the clip started on its own as its slide came up, with no speaker icon on screen.
To make the slides move on by themselves too, open the ⋮ menu at the bottom left of the slideshow and choose Auto-play. You pick one interval for the whole deck, from every second to every minute, and mine was set to every 2 seconds. With Stop on slide change ticked, pick an interval longer than your longest clip. My clips ran 6 to 8 seconds, so every 10 seconds fits.
I didn’t share my test deck, so this part is Google’s advice. The audio files stay in your Drive, so viewers need access to them as well: click Share and add the people or groups. When the deck has audio or video in it, Slides’ access checker may suggest updating the files’ permissions too. Google’s steps for making sure a presenter can play the clips end with confirming those changes.
If you don’t want to record yourself, an AI voice can read your script. The result slots into method 2: one clip per slide.
The test project
A 78-word script for four slides, read by one AI voice
4
Paragraphs = clips
~21 s
To generate all 4
28.8 s
Total narration
.mp3
One zip, numbered
In my project
I wrote a short lesson on the water cycle, one paragraph per slide: an intro, then evaporation, condensation, and precipitation and collection. I pasted all four paragraphs into a new Studio project at once, and Studio split them into four blocks. Then I selected all the blocks and changed the voice once, from the default Ava to Emma, which applied it to every block.
Clicking Generate made the speech for all four blocks in about 21 seconds. With the blocks still selected, the download button saved a zip of four MP3 files, numbered in block order.
These are the four files from that zip, untouched. Each one would go on its own slide:
One clip per slide
Voice: Emma, default speed
1.mp3 → slide 1
Intro · 6.3 s
2.mp3 → slide 2
Evaporation · 7.6 s
3.mp3 → slide 3
Condensation · 7.4 s
4.mp3 → slide 4
Precipitation · 7.6 s
What I found:
Then I uploaded the four files to Drive and inserted them into the test deck, one per slide, as in method 2. The clip in that section shows 2.mp3 going onto the Evaporation slide.
Yes. Click Record on the right of Slides (method 1), then Record video. Choose Screen to record the slides with your voice, without your face. It records in Google Vids, in Chrome or Edge. If your account had the older Slides recording tool, Google says it’s now under View → Slides Recording.
.mp3 and .wav, and the file has to be in your Google Drive. Convert anything else first, such as an .m4a voice memo.
The clips are separate files in your Drive, so viewers need access to them too. Share the presentation with the Share button, and confirm the access checker’s permission changes when it suggests them.
30 minutes. The timer in the new Vids recorder read 0:00 / 30:00 when I recorded, and Google’s help gives the same 30 minutes for the older Slides recording tool.
Yes, in Google Vids. Record the deck with method 1, click Edit, then use AI voiceover: type a script, pick a voice and insert it. It worked on my personal Google account. The voice goes into the Vids video, not into your Slides deck. To keep the narration inside the deck, put a clip on each slide (methods 2 and 3).
All checked on 20 October 2026, the day I ran the tests above:
How to make a video narrated by an AI voice: two ways to set it up, then each step from script to YouTube upload, tested on a real 29-second explainer.
Which Kindles and Kindle apps read aloud, how to turn on Assistive Reader and VoiceView, and why text to speech is greyed out on some books (Oct 2026).
Free voice over software, tested: record your own voice or let AI read the script. Real samples, free-plan limits, watermarks and commercial-use rules.
Natural, celebrity and character voices. Or clone your own.