How to Add Voiceover to TikTok Like a Pro
If you need to add a quick voiceover to a TikTok, you've got two main options built right into the app: recording your voice directly in the editor or using the text-to-speech feature. Both are super straightforward ways to add some narration or funny commentary without ever leaving TikTok.
Why TikTok Voiceovers Are Your Secret Weapon
Ever scrolled through TikTok and a video just stops you? Chances are, it had a killer voiceover. Before we get into the nuts and bolts of how to do it, let's talk about why adding your voice is such a game-changer.
A great voiceover isn't just about explaining what's happening on screen. It adds personality, tells a story, and creates a real connection with your audience—and that's what makes people stop scrolling.
Building a Real Connection
Think of your voiceover as a direct line to your viewer. When someone hears a human voice—whether it's your own or a high-quality AI one—it makes the experience feel much more personal and intimate. It's how you turn a simple video clip into something memorable.
A solid voiceover can:
- Dial up the emotion: You can convey humor, drama, or excitement in a way that visuals alone just can't.
- Give much-needed context: Use it to walk people through a tricky tutorial or share the backstory of your latest travel vlog.
- Define your brand: A consistent voice and style make your content instantly recognizable in a crowded feed.
This is especially important given how massive TikTok is. We're talking a projected 1.9 billion monthly active users by 2025. People aren't just popping in and out, either; they spend an average of 58 minutes a day on the app. That's a huge, engaged audience ready to connect with your content.
Want to take your voiceover-driven content to the next level? A huge part of success on the platform is understanding the algorithm. Learning how to make your videos go viral is key to getting your content seen.
Once you get why voiceovers are so powerful, you can start making videos that don't just rack up views, but actually build a community.
Mastering TikTok's Built-In Voiceover Tool
You don't need any fancy, expensive software to add narration to your videos. TikTok actually has a pretty powerful voiceover tool built right into the editor. It’s a super quick and easy way to add commentary, tell a story, or just give a bit more context without ever having to leave the app.
This native feature is a game-changer for creators who want to add that personal touch with their own voice. Let's break down how to get the most out of it.
Finding and Using the Voiceover Feature
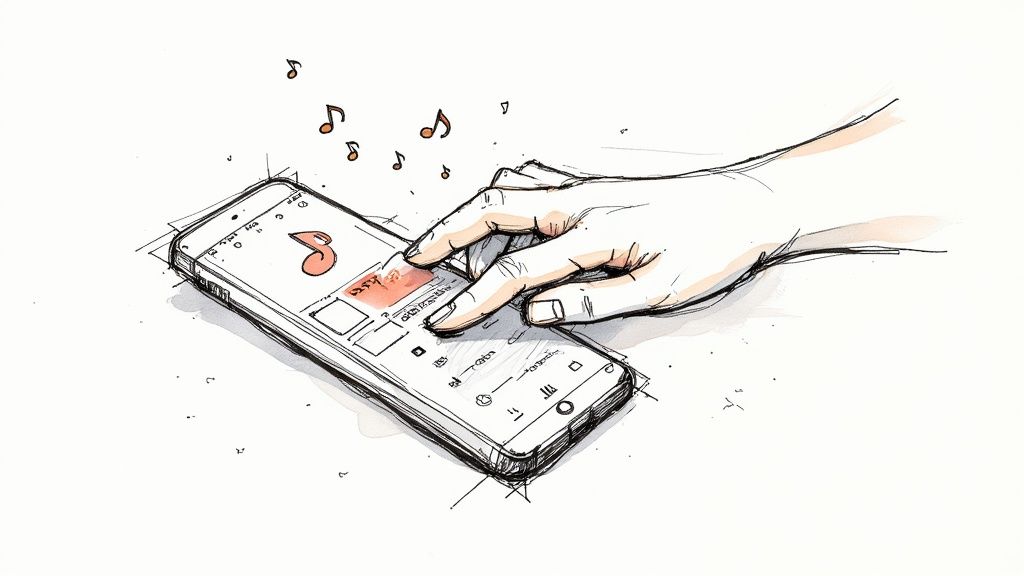
Once you’ve recorded or uploaded your clips, just tap the checkmark to get to the main editing screen. Over on the right-hand side, you’ll see an option for "Audio editing," usually with a little microphone icon. Give that a tap, and you’ll land in the voiceover recording interface.
You'll see your video timeline laid out in front of you. You can drag the white marker to the exact spot where you want your narration to kick in. This is so important for getting your timing right, whether you're landing a punchline perfectly or explaining a crucial step in a DIY tutorial.
Ready to record? Just press and hold the big red record button and speak clearly into your phone's mic. If you flub a line, no big deal—you can delete the take and just go again. A classic rookie mistake is recording somewhere with a lot of background noise, so try to find a quiet room to make sure your audio sounds crisp and clean.
Pro Tip: You aren't limited to one long take! You can record multiple voiceover segments in a single video. Just record your first bit, then move the timeline marker to a new spot and repeat the process. This is perfect for narrating different scenes without the pressure of a single, flawless recording.
Managing Your Audio Levels
Okay, you've recorded your voiceover. There's one last tweak that makes a huge difference: managing the original sound from your video. By default, TikTok just layers your new voiceover right on top of whatever audio was already there. You’ve got two main options:
- Layer the sounds: Want to keep some of the original audio, like background music or ambient noise? Just uncheck the box at the bottom that says "Replace original sound with recording." This lets you use the volume sliders to dial down the original sound so your voice is still the main event.
- Replace the original sound: If you want a clean narration where only your voice is heard, keep that box checked. It completely mutes the video's original audio, putting your voiceover front and center.
To make sure you've got all the bases covered, here's a quick cheat sheet for the native TikTok tool.
Quick Guide to the TikTok Voiceover Feature
This table is a handy reference to ensure you’re hitting all the key steps for a high-quality voiceover directly in the app.
| Feature | Action | Pro Tip |
|---|---|---|
| Finding the Tool | Tap the checkmark after filming, then select "Audio editing" on the right-side menu. | Look for the microphone icon—it's your gateway to all audio adjustments. |
| Recording | Press and hold the red record button to speak. Release to stop recording. | Find a quiet space! Your phone's mic will pick up everything, from fans to fridges. |
| Timing | Drag the white line on the timeline to the exact start point for your voiceover. | For comedic timing or tutorials, sync your words precisely with on-screen actions. |
| Multiple Takes | Record a segment, move the timeline marker, and record another. | Don't try to get it all in one go. Break your script into smaller, manageable chunks. |
| Volume Control | Uncheck "Replace original sound" to access sliders for both original audio and voiceover. | Lower the original audio to around 10-20% to create ambiance without drowning out your voice. |
| Replacing Audio | Keep "Replace original sound" checked to completely mute the original video's sound. | This is best for tutorials, storytimes, or any video where your narration is the only audio needed. |
Getting comfortable with this simple tool is the first real step toward creating more polished and engaging content—all without leaving TikTok.
Unlocking Studio-Quality Audio with AI Voiceovers
While TikTok’s built-in tool is great for quick, on-the-fly recordings, it definitely has its limits. What happens when you’re crunched for time, aren’t a fan of how your own voice sounds on camera, or just need a narration that’s perfectly crisp and professional?
This is exactly where AI voiceover tools come in and completely change the game for creators.
Platforms like Lazybird give you that studio-quality audio without needing an expensive mic or a soundproof room. Instead of stressing about the neighbor's dog barking or stumbling over your words, you just type out your script and let the AI do the heavy lifting.
This isn't just a small trend; it's quickly becoming a core part of content creation. AI voiceover tech has made a huge impact on TikTok advertising by letting brands create high-quality narrations fast and affordably, no human voice actors needed. In fact, The Short Media highlighted how AI voices are making TikTok ads way more engaging.
The Benefits of Using AI Voiceovers
Going with an AI-generated voiceover isn't just about convenience—it's a smart, strategic move to make better content, faster. You get a level of control and quality that’s pretty much impossible to hit with a simple home recording setup.
Here are some of the biggest wins:
- Flawless Audio Every Time: AI voices are born in a perfect digital space. That means zero background noise, no awkward pauses, and no weird volume jumps. Just clean, consistent audio.
- Endless Variety: You can pick from hundreds of different voices, accents, and tones. This lets you find the perfect voice to match your brand's personality, whether you need something upbeat and fun or calm and authoritative.
- Save a Ton of Time: Let's be real, recording and editing your own audio is a major time-sink. With an AI tool, you can shrink that entire process down to just a few minutes, which frees you up to focus on the fun stuff, like visuals and strategy.
Think of it this way: an AI voiceover tool is like having your own personal, on-demand voice actor. You get a perfect take every single time, without the hassle of endless retakes or the cost of hiring a pro.
How to Add a Voiceover to TikTok with Lazybird
Using a platform like Lazybird to create your TikTok narration is incredibly simple. You don’t need any technical chops to get a professional-sounding result.
The whole process moves the audio creation outside of TikTok, which gives you way more flexibility before you even start piecing your video together. If you want a deeper dive, we have a whole guide on https://www.lazybird.app/blog/how-to-use-ai-voice for your projects.
The workflow couldn't be easier:
- Write Your Script: First thing's first—write out exactly what you want the voiceover to say.
- Paste and Select: Copy and paste your script into Lazybird. Then, browse the library of AI voices to find one that fits the vibe of your video.
- Generate and Download: With just a click, the platform generates your audio file. From there, you just download the MP3, and it's ready to be dropped into your video editor.
This method gives you a polished, high-quality audio track that you can easily sync up with your video clips. The end result? Your TikTok will sound like it was produced in a professional studio.
Adding AI-Generated Audio to Your TikTok Video
Alright, you've used Lazybird to generate a crystal-clear AI voiceover. That’s the hard part done. Now, let’s get that audio into your video and really make your content pop.
This is where you sync the audio with your visuals to create the final, polished TikTok you've been imagining. And no, you don't need to be a video editing wizard to pull this off.
A free app like CapCut is perfect for this. It’s all about importing your video clips and the new AI audio file, then lining them up on the timeline. It’s simpler than it sounds, I promise.
This little graphic breaks down the basic flow of how it works.
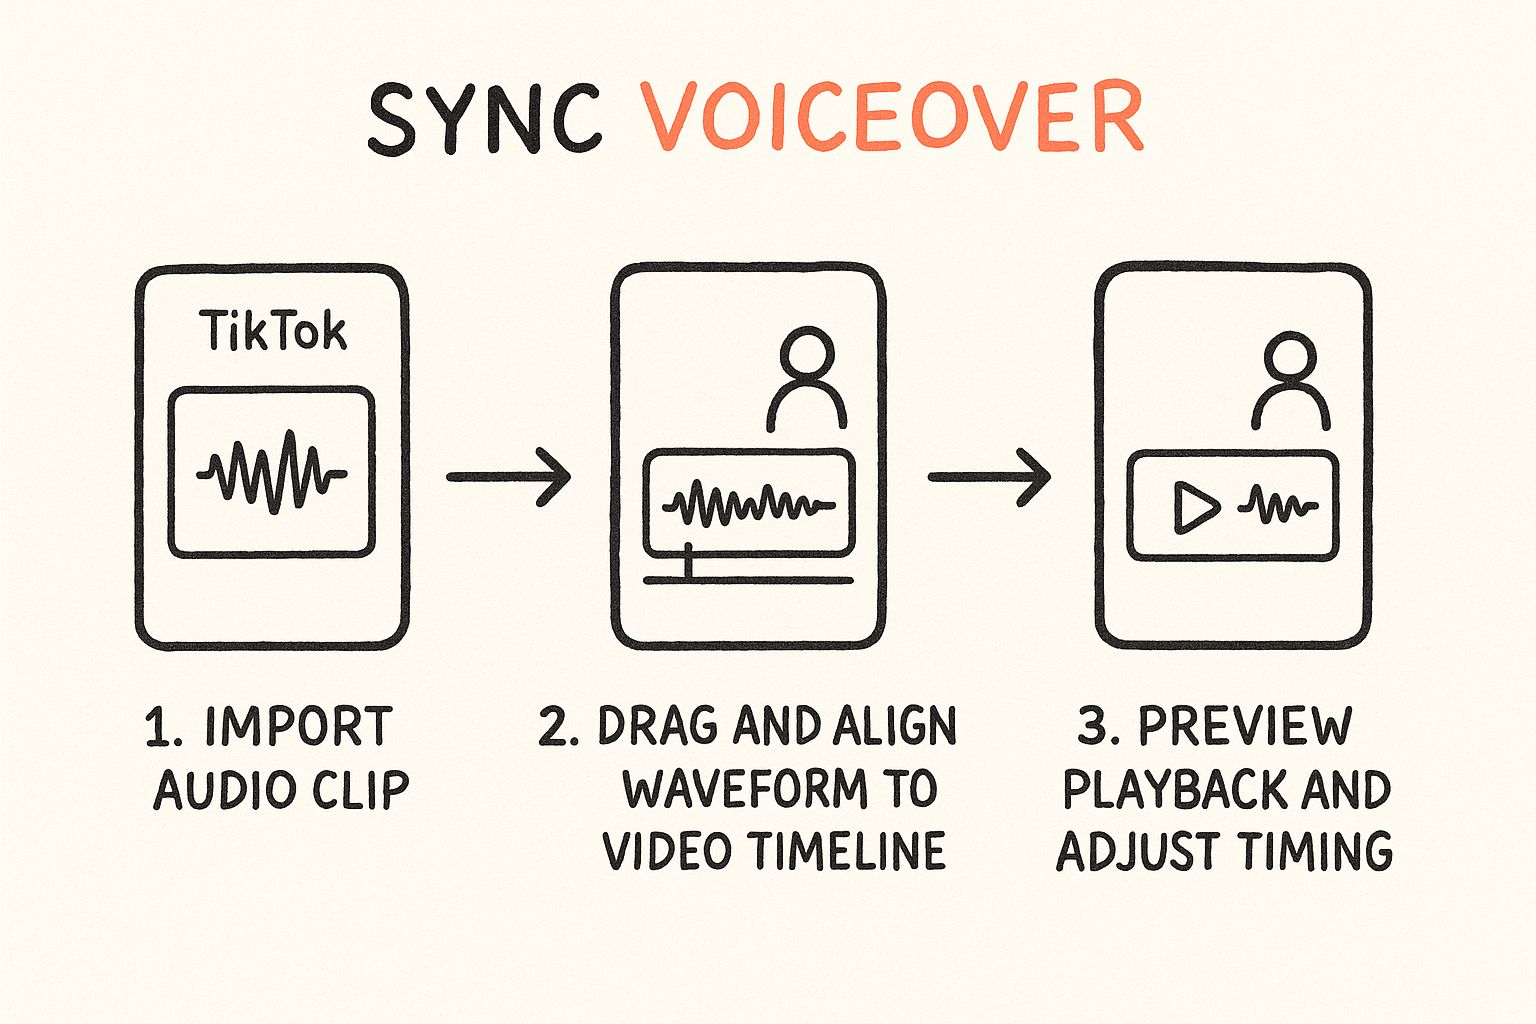
As you can see, it really is just a matter of dropping your files in, aligning them, and maybe making a few tiny tweaks to the timing.
Syncing Your Audio and Video
Once you’ve dropped both your video and your Lazybird audio into your editor, you'll see them on separate tracks. This is your playground. The main goal here is to drag the audio clip so the narration lines up perfectly with what's happening on screen.
Play it back a few times. Does the voice kick in at the right moment? If not, just nudge the audio clip a tiny bit left or right. Keep doing that until it feels natural.
This is exactly where using an AI voice gives you a massive leg up. Since the audio is already perfect, you can put 100% of your focus on getting the timing just right instead of re-recording your lines for the tenth time. If you want a full deep-dive on this, we’ve got a guide on how to create AI voice overs for videos in minutes that walks you through everything.
Balancing and Exporting Your Final Video
With your voiceover synced up, there's just one last touch: sound mixing. If your original video has distracting background noise, you’ll want to dial its volume way down. The goal is to make your AI narration the star of the show. Most editors make it super easy to adjust the volume for each clip.
A quick pro tip: Think of any original audio you keep as quiet background ambiance. It shouldn't compete with your voiceover. Let the narration shine.
That’s it! Now just export your masterpiece. I’d recommend choosing a high-resolution setting like 1080p so it looks crisp and professional on TikTok. You now have a slick video with a studio-quality voiceover, ready to upload and grab some attention.
If you’re curious about other ways to level up your content, looking into creating engaging video posts with AI can offer some great ideas that go beyond just voiceovers.
Choosing the Right Voiceover for Your Video
So, you’ve got your video planned out. Now comes the big question: should you use your own voice or go with an AI narration?
Honestly, there’s no single right answer here. It all comes down to the goal of your video and the kind of vibe you want to create with your audience. Think of it as a strategic choice, not a "one-is-better-than-the-other" situation.
Your own voice is your secret weapon for building a real connection. When you're making personal vlogs, sharing behind-the-scenes moments, or telling a story from your life, nothing beats the authenticity of your actual voice. It makes your content feel more intimate and helps build genuine trust with your followers.
When to Use an AI Voice
But what if you need polish and consistency? This is where an AI voice really shines. It's the perfect tool for times when crystal-clear delivery and efficiency are your top priorities.
I'd definitely lean on an AI voiceover from a tool like Lazybird if I were creating:
- Tutorials and How-To Guides: An AI narrator delivers a steady, easy-to-follow voice that helps your audience soak up the information without getting distracted.
- Faceless Content: Running a channel where you don't show your face? A professional AI voice can become the consistent, recognizable "host" for your brand.
- Brand Announcements: For anything official, an AI ensures your message is delivered with the perfect professional tone every single time. It keeps your brand image sharp and consistent across all your videos.
Using an AI voice lets you batch-create a ton of content with a uniform sound. This saves a massive amount of time on recording and editing, freeing you up to focus on the fun part—being creative.
And hey, even if you decide to use your own voice, it's worth brushing up on some fundamental voice acting techniques for beginners. A few simple tricks can make your personal recordings sound way more polished.
Ultimately, the best choice is whatever serves your video's purpose and fits your workflow.
Answering Your Top TikTok Voiceover Questions
Even with the best tools, creating the perfect voiceover can feel a bit tricky at first. Let's tackle some of the most common questions and roadblocks creators run into.
Can I Edit My Voiceover After I’ve Recorded It On TikTok?
This is a big one. Unfortunately, TikTok’s built-in editor doesn't let you tweak a voiceover once it's recorded. If you slip up or don't like the take, your only choice is to scrap the whole thing and start over. It's a real pain.
That’s why so many creators prefer to work with an external editor like CapCut. You can perfect your audio file first and then just drop it into your project. Using an AI voice from a tool like Lazybird is a massive shortcut here, since the audio is already flawless before you even get to the editing stage.
Why Is My Original Video Sound Drowning Out My Voice?
Ah, a classic rookie mistake we've all made. This usually happens when you forget to turn down the volume of the original video clip after laying down your narration.
Pro Tip: After you record your voiceover in the TikTok editor, look for the "Replace original sound" checkbox and make sure it’s unchecked. This will bring up a volume slider for the "Original sound." You'll want to slide that way down so your voice comes through loud and clear.
How Can I Make My Voiceover Sound More Professional?
For that crisp, clean, professional sound, nothing really beats a high-quality AI voiceover. It gets rid of all the background noise, the pacing is always perfect, and you get a whole library of voices to match your video's vibe.
If you're set on recording your own voice, the key is to find the quietest room in your house—seriously, no fans, no refrigerators humming in the background. Get close to your phone's microphone and speak clearly and steadily.
Is It Possible To Add A Voiceover To Only Part Of A Video?
Yep, absolutely! You can do this easily, whether you're using TikTok's editor or a separate app.
It's all about positioning. Just drag the recording timeline (or the audio clip itself) to line up with the exact moment in the video you want the voiceover to start and end. This is perfect for narrating specific scenes while letting the original audio play during others.
Ready to skip the retakes and create flawless, studio-quality voiceovers in just a few minutes? Lazybird makes it incredibly easy to generate professional AI audio for all your TikToks. Just paste your script, pick a voice you love, and download your perfect audio file.